Prevent image hotlinking for Joomla using FTP
This tutorial will show you how to prevent image hotlinking for Joomla using FTP
Hotlink protection prevents other websites from linking to your images and files and thereby stealing your bandwidth. Let’s find out how to manually enable it just for your Joomla directory
This tutorial is intended for servers that do not have cPanel or some other control panel installed, or that have a control panel that does not allow you to automatically add hotlink protection to your site
Your website must be on a server that runs Apache web server with mod_rewrite installed
First, we’ll need to create a new text document
1) Right-click in Windows Explorer
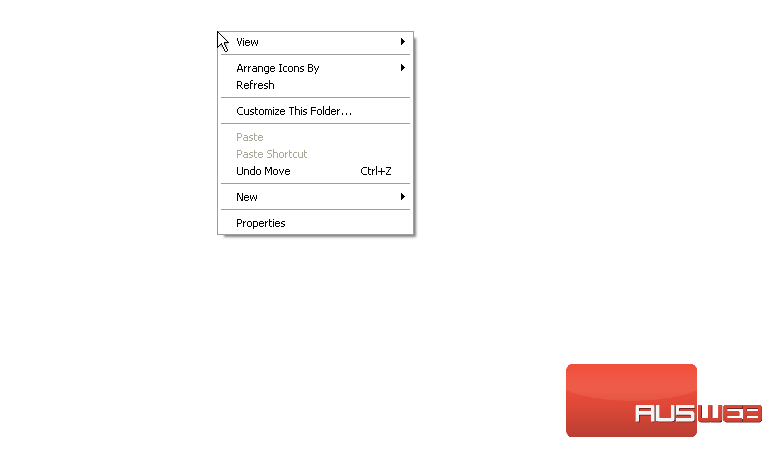
2) Go to New
3) Then, click Text Document
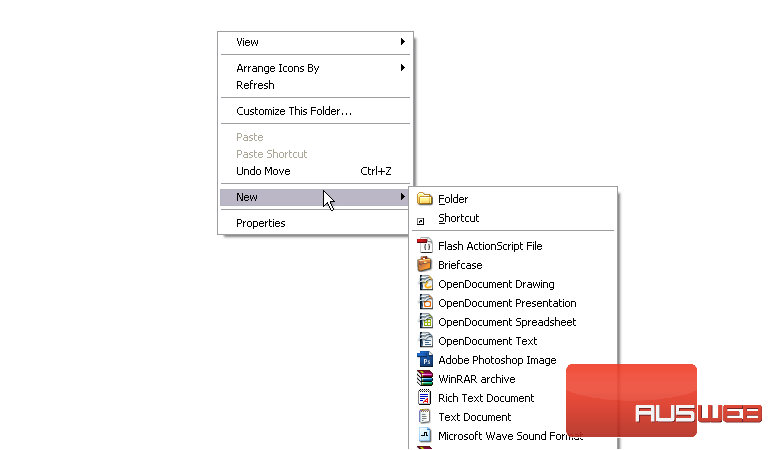
4) Name the file htaccess.txt and press Enter

5) Double-click to open the file with Notepad
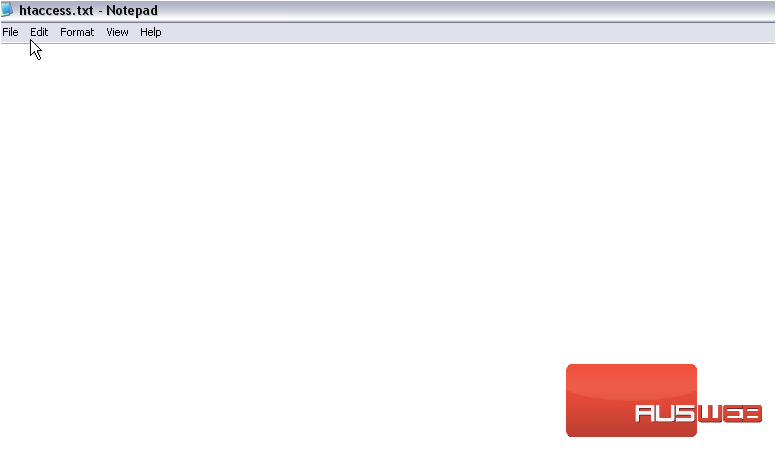
6) First, type RewriteEngine on
Here, we’ll need to type several lines of code that will determine which websites should be allowed to hotlink to your files, which types of files the hotlinking restrictions should be imposed upon, as well as some related options
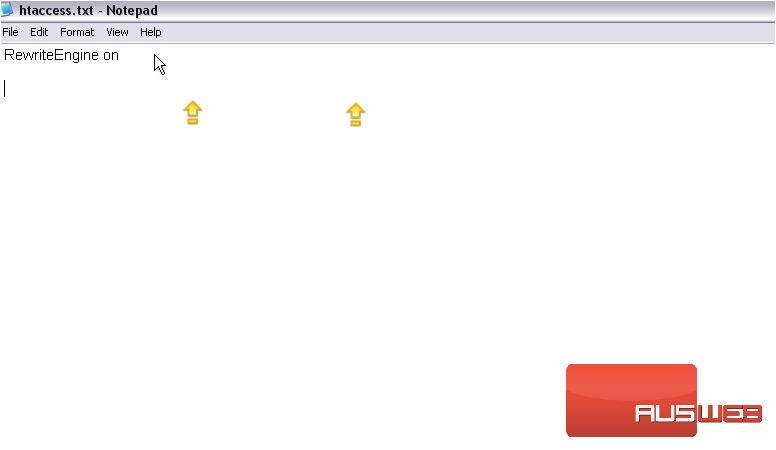
This enables mod_rewrite, which lets us control what Apache does with the URL it receives
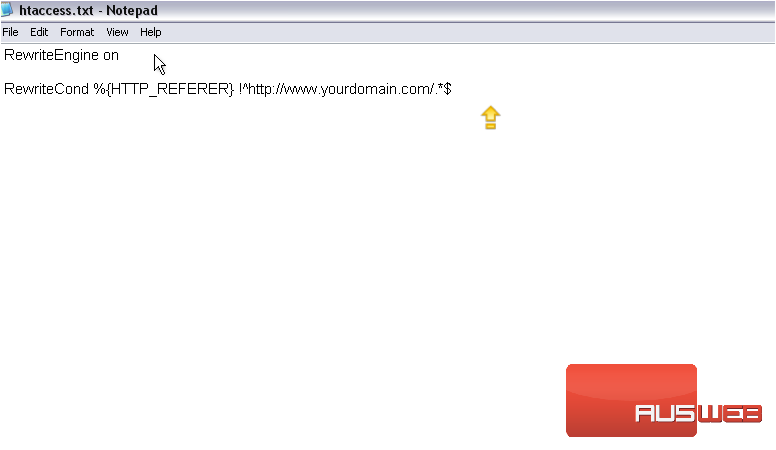
From here on, follow along with the typing. Be sure to type exactly what you see, simply replacing “yourdomain.com” with your domain name(s)
Note that this is an intentional misspelling of the word referrer, dating back to the origins of the web. It is not a typo
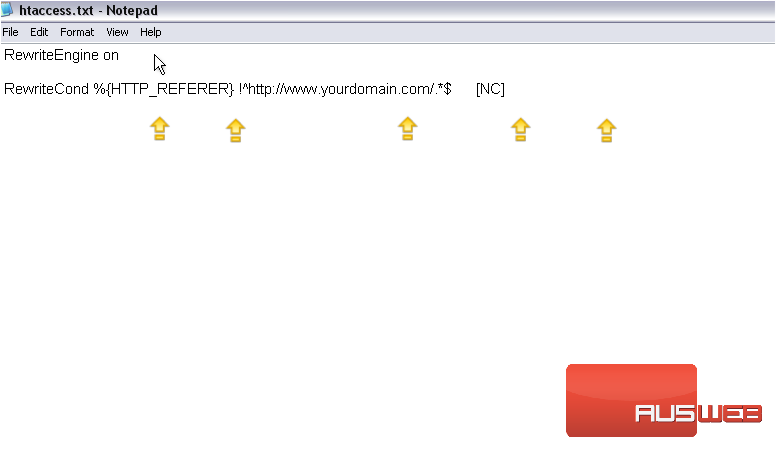
When a request for a file is sent to a web server, a number of headers are sent from your browser. One of these is known as the Referer
Referers are sent in two cases: when a web page loads an image or other type of file as part of its contents, and when someone follows a link on a page
This last part is key; it tells Apache to allow access to any request whose referer starts exactly with http://www.yourdomain.com/
[NC] stands for “no case”, which means the referer specified is not case-sensitive. In other words, this line will match any combination of uppercase and lowercase letters
Now, we need to specify which file extensions to apply the referer restrictions to
7) Change the extensions specified here to whichever ones you want. Just separate them with the pipe symbol |, which can typically be typed by pressing the SHIFT key along with backslash
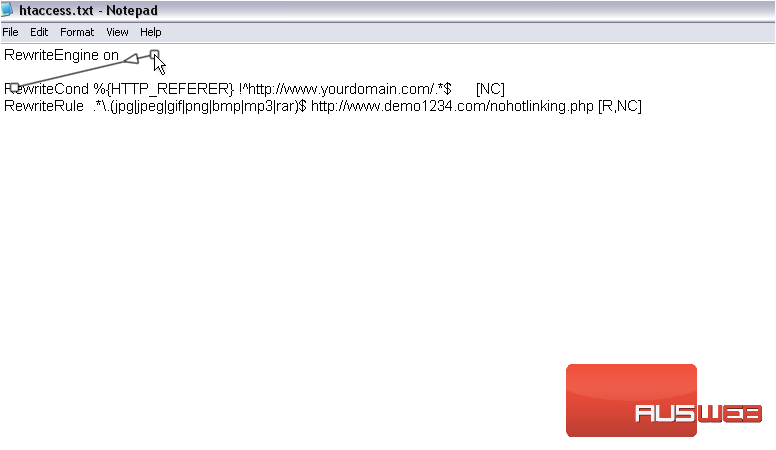
This is the URL someone will be redirected to if they trigger the hotlink protection
The R stands for forced redirect. Replace it with an F and remove the URL portion of this line if you would rather force a 403 Forbidden error to be displayed
Next, let’s add a few more lines to finish giving access to yourdomain.com
8) Press CTRL+C to copy…
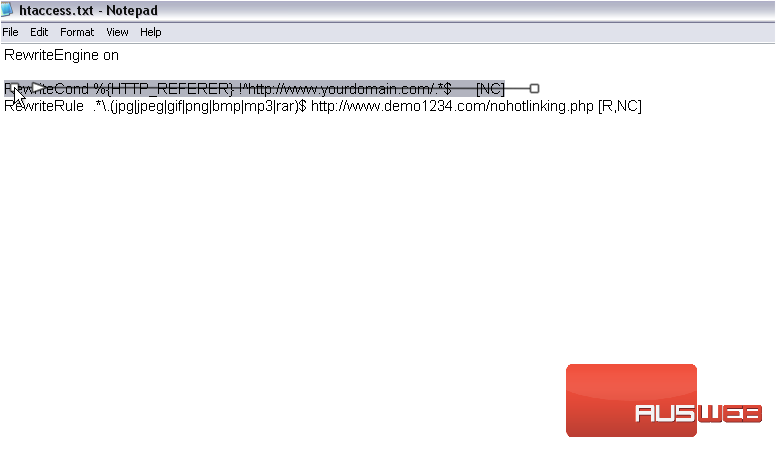
9) Press Enter, then CTRL+V to paste
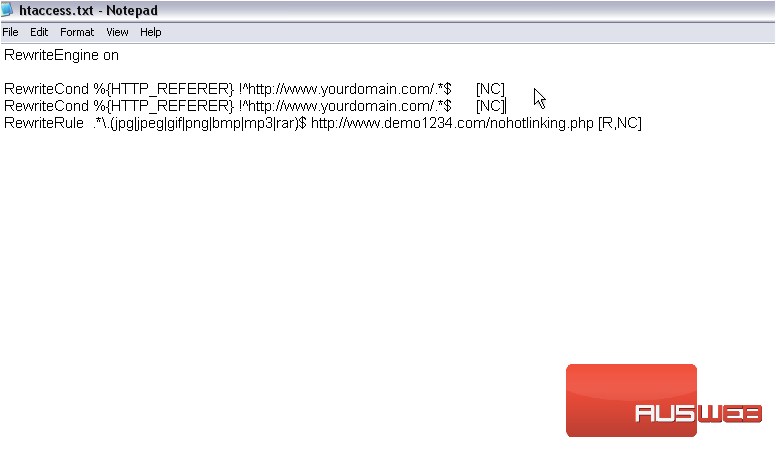
10) Delete the last part of the URL to allow the homepage, without a trailing slash or anything after the domain name, to have access to your protected files
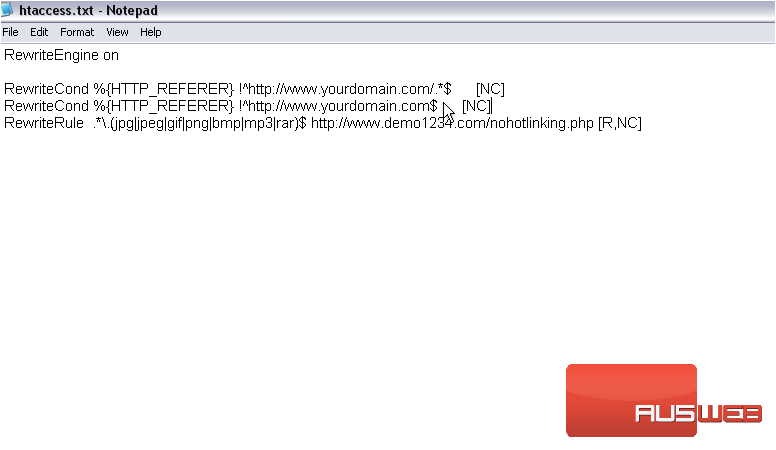
11) Now, copy and paste this part as before
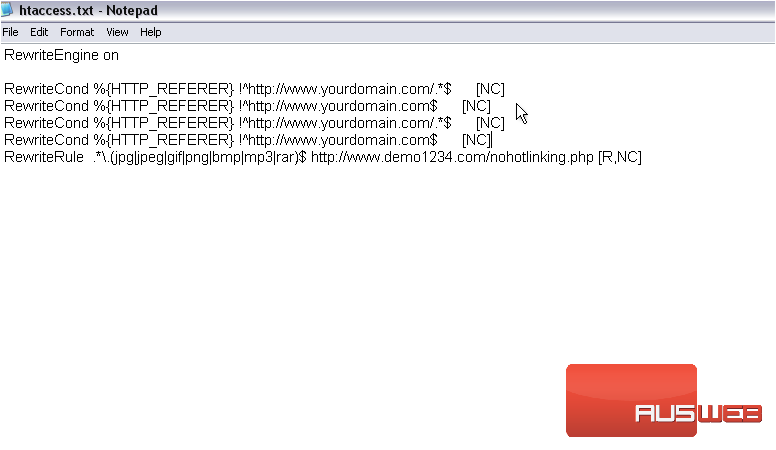
12) Remove “www.” from the two new lines
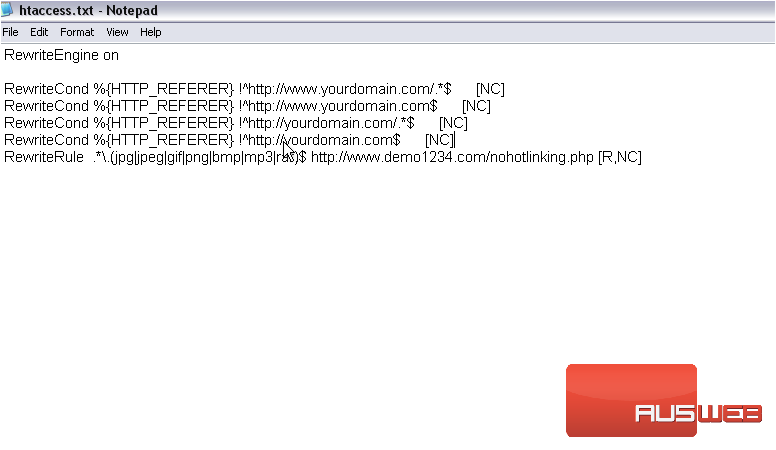
Both yourdomain.com and its www subdomain have been set up
Currently, the only way people will be able to access your protected files will be through yourdomain.com. Even manually typing the URL for one of your files won’t work. Let’s fix that
This does what we want by making the referer optional: Manually entered URLs have no referer
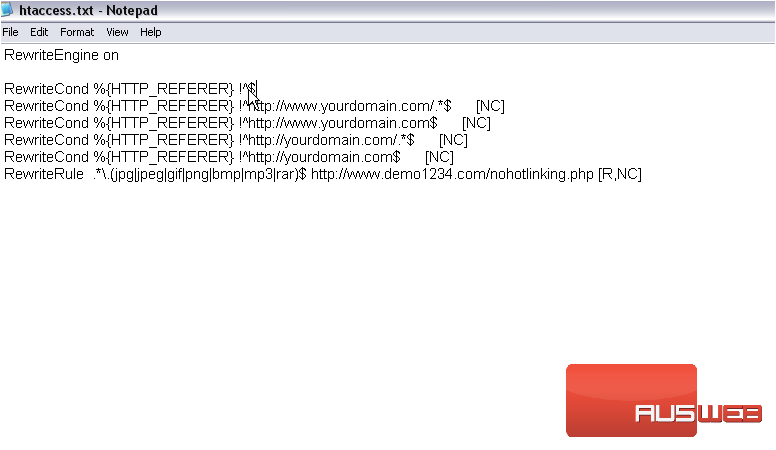
There are no letters in this referer now, so [NC] is not needed and can be deleted
Let’s add another domain name to the list
13) Copy and paste all four lines we typed for yourdomain.com
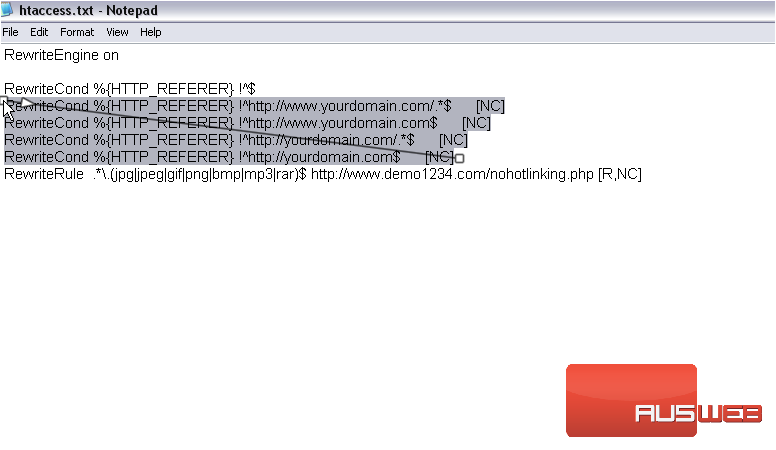
14) Now, press CTRL+H to find and replace yourdomain.com with demo1234.com for just these four newest lines
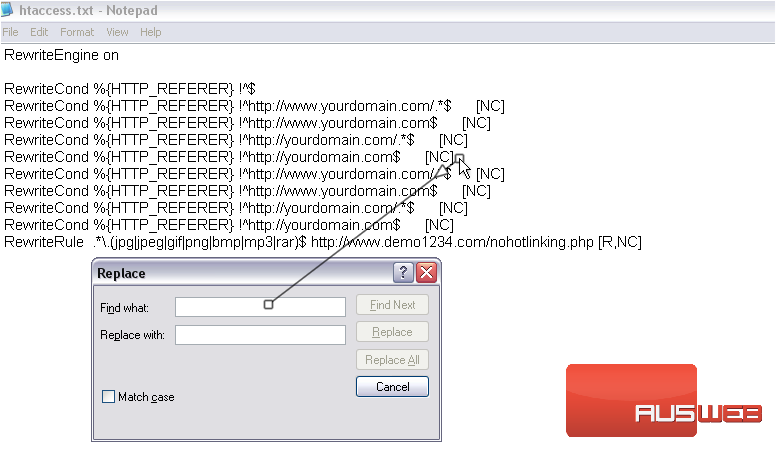
15) Press Replace until all four lines have been updated with the second domain
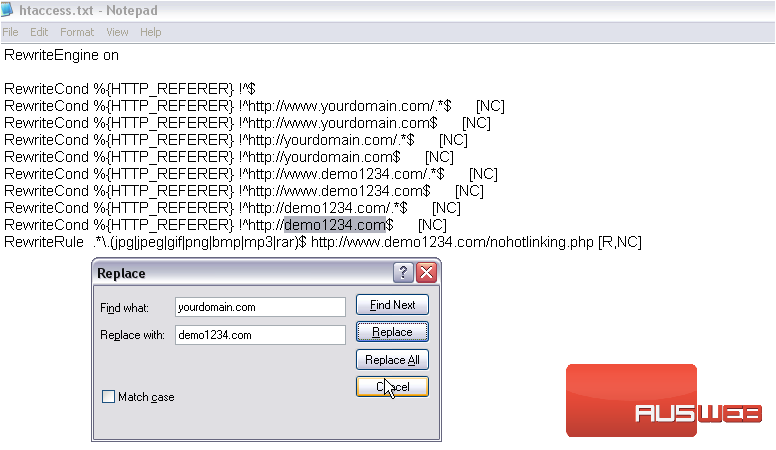
16) Click Cancel
Repeat these steps for as many domain names as you want
17) Press CTRL+S to save the file
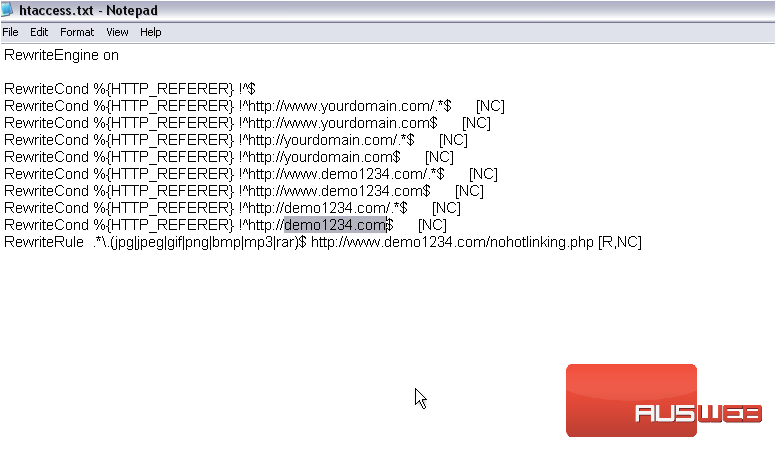
Now that the htaccess file is complete, it’s time to upload the file to the Joomla directory using FTP
For this tutorial, we’ll be using FileZilla to access our FTP server; you can use whichever program you want
Joomla provides you with an htaccess.txt file that you can choose to use, so let’s find that one and rename it in case you decide to use it in the future
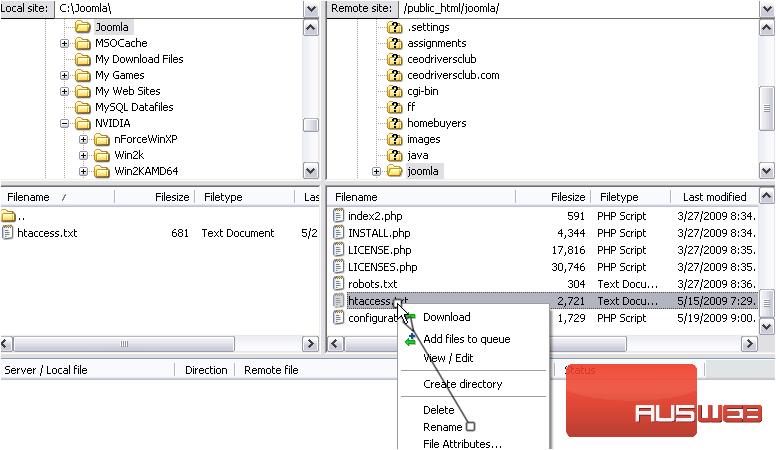
18) Now, drag and drop the file we created to the Joomla directory on your server and scroll up to find it
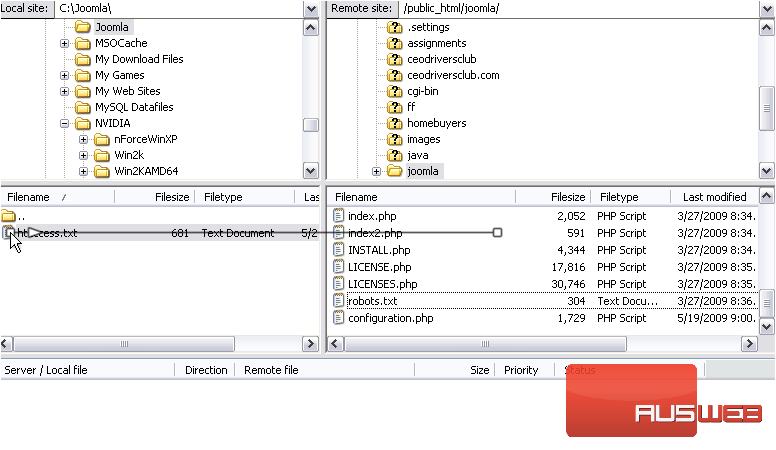
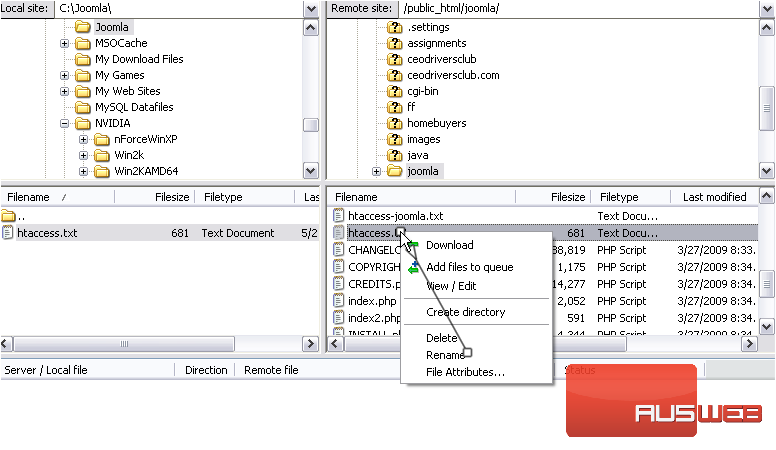
19) Right-click and rename it to .htaccess. Windows would not have allowed us to name it this
Whew! That was a lot of work! But, now you know how to prevent people from hotlinking to files on your Joomla site

