Installing SSL on Windows Server
This document outlines the process of installing an SSL certificate on a Windows Server which does not have a panel.
What is required?
- Confirm you are able to access your Windows Server using RDP.
- Components of the certificate: Private Key, Certificate, Intermediate CA information.
- Converting the SSL certificate
- Installation in IIS 6/7/8.
SSL Installation Steps:
Converting the SSL certificate:
- Copy and paste the Private Key, Certificate, Intermediate CA information in separate notepad files.
- Save these files with the following extensions:
- .key for the Private Key file
- .crt for the Certificate file
- .ca for the Intermediate CA file
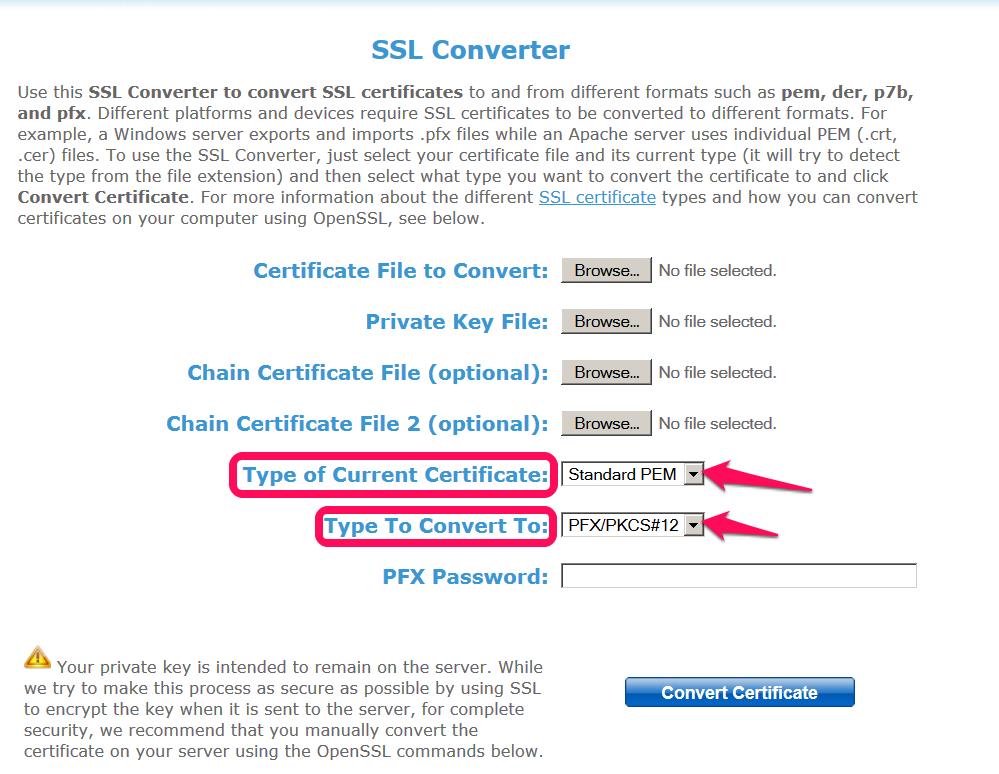
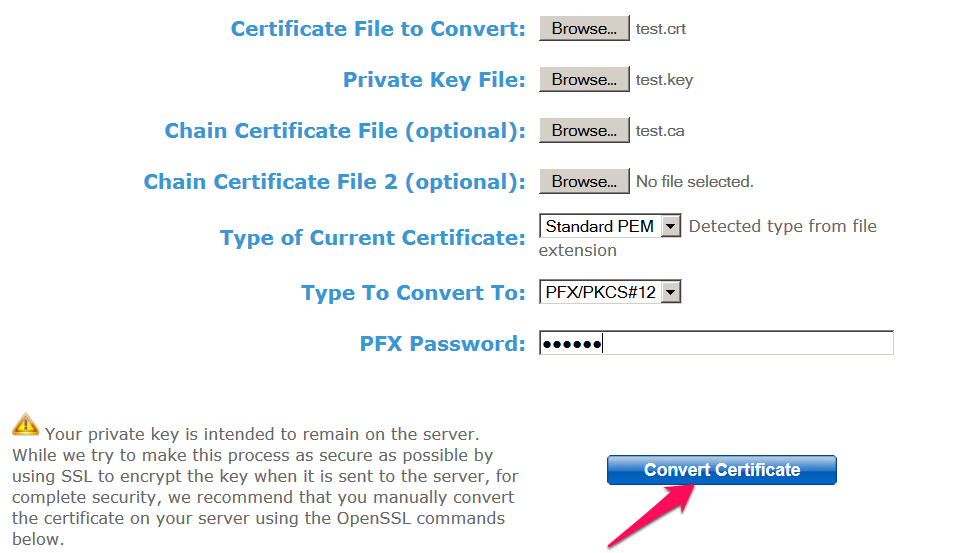
- Visit the site: https://www.sslshopper.com/ssl-converter.html
- Select Type of Certificate to Standard PEM
- Select Type To Convert To: PFX/PKCS#12
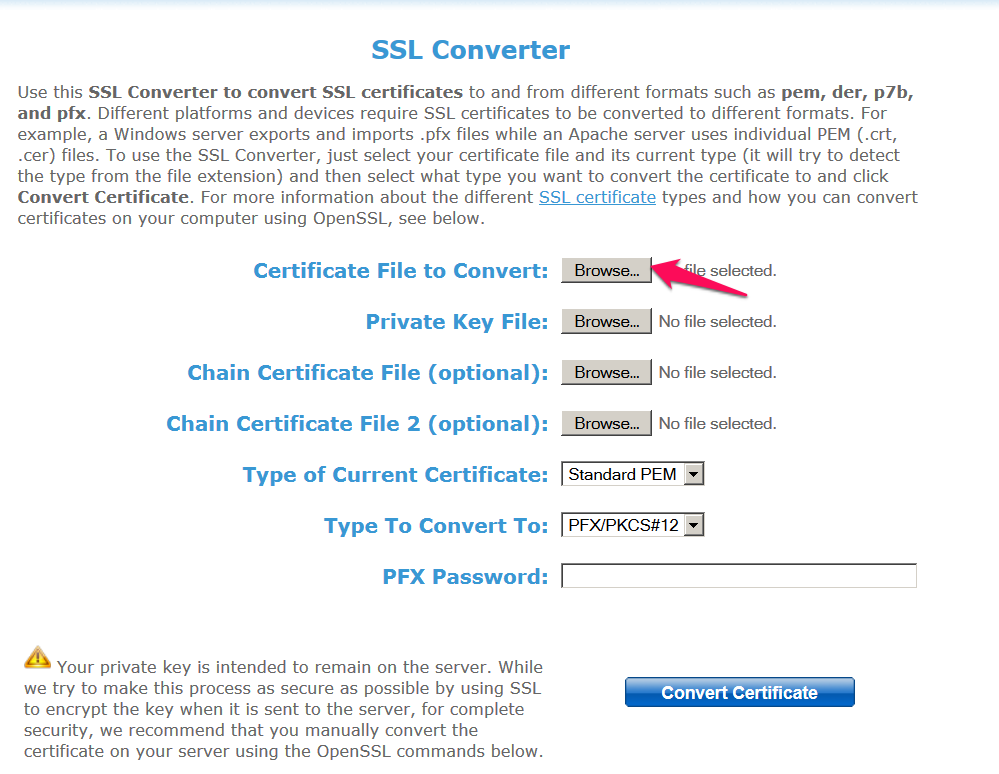
- Click on the Browse Button next to Certificate File to Convert:
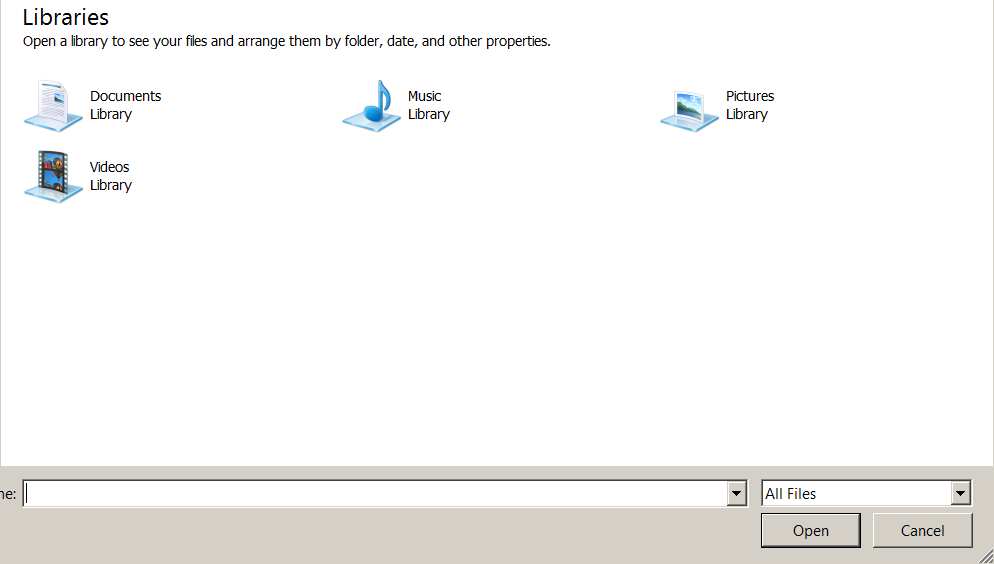
- Choose the location of the .crt file.
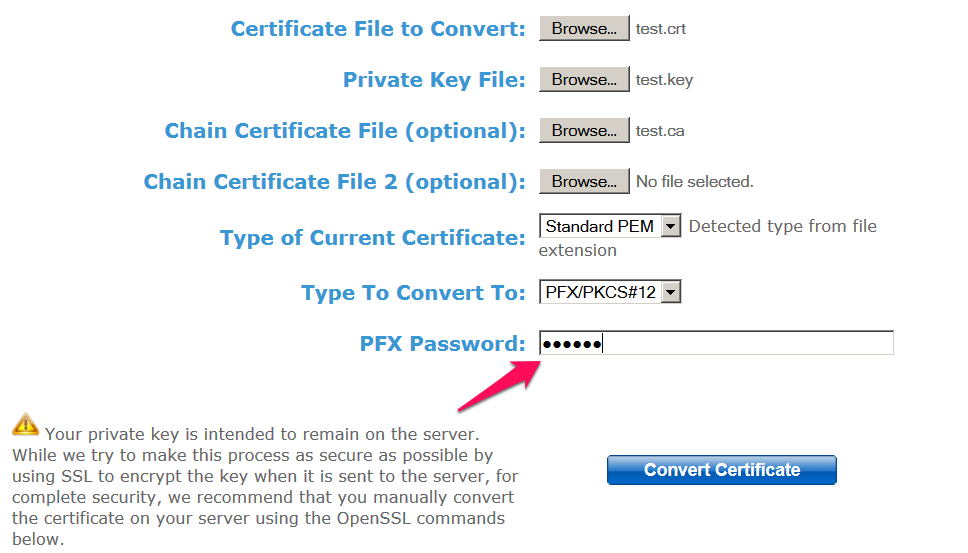
- Upload the Private Key and Intermediate CA files similarly in the Private Key File section and Chain Certificate File section.
- Enter a password in the PFX Password box. You will need to remember this password for the next step.
- Click on the Convert Certificate button.
SSL installation in IIS 6/7/8:
- Log in to your server using Remote Desktop.
- Open IIS Manager by clicking Start > Administrative Tools > Internet Information Services (IIS) Manager.
- Double-click the computer name at the top-left of the window.
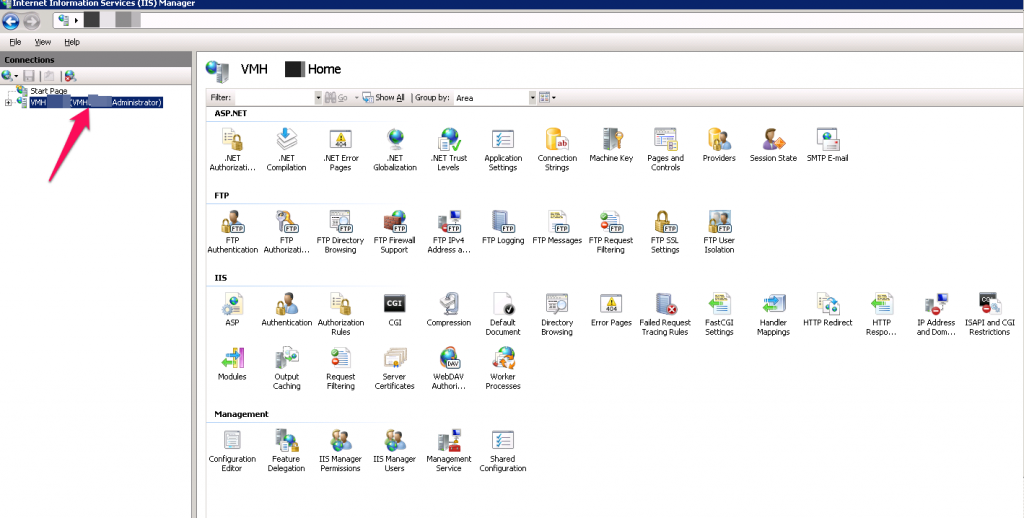
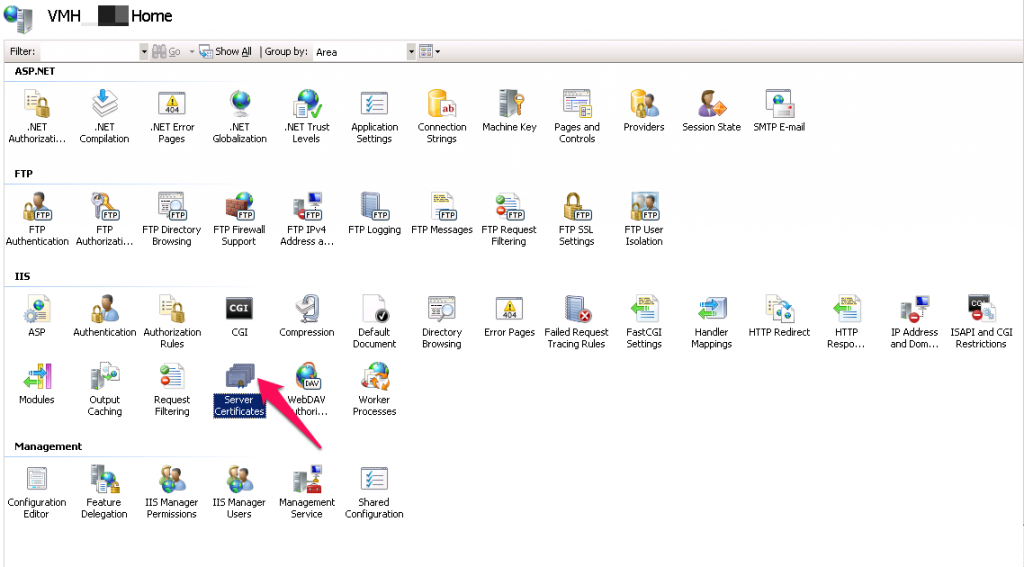
- On the right-hand side, scroll down and double-click the Server Certificates icon.
- On the top-right of the window, click the Import link.
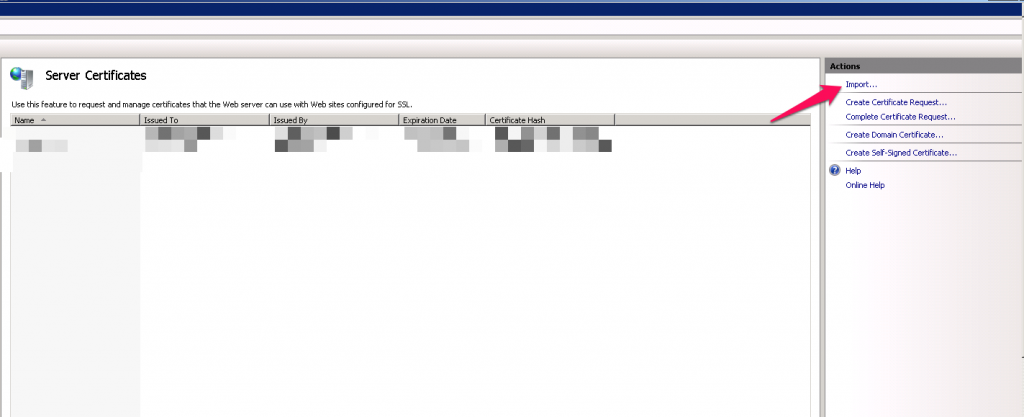
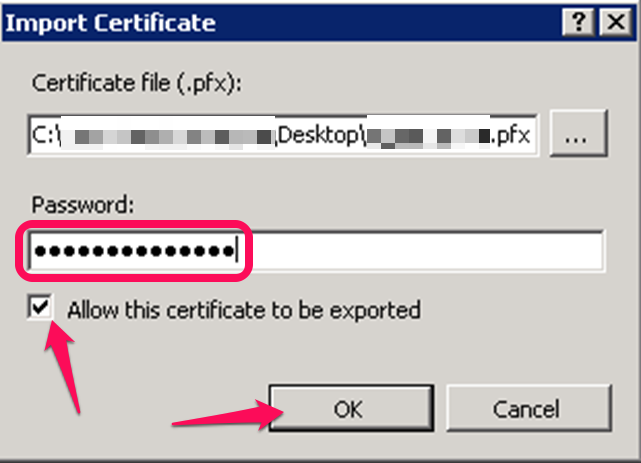
- In the new window, click the ellipsis (…) button to locate the .pfx file on the server. Enter the password you chose when generating the PFX file into the text box. Also, check the box for Allow this certificate to be exported. When finished, click the OK button.
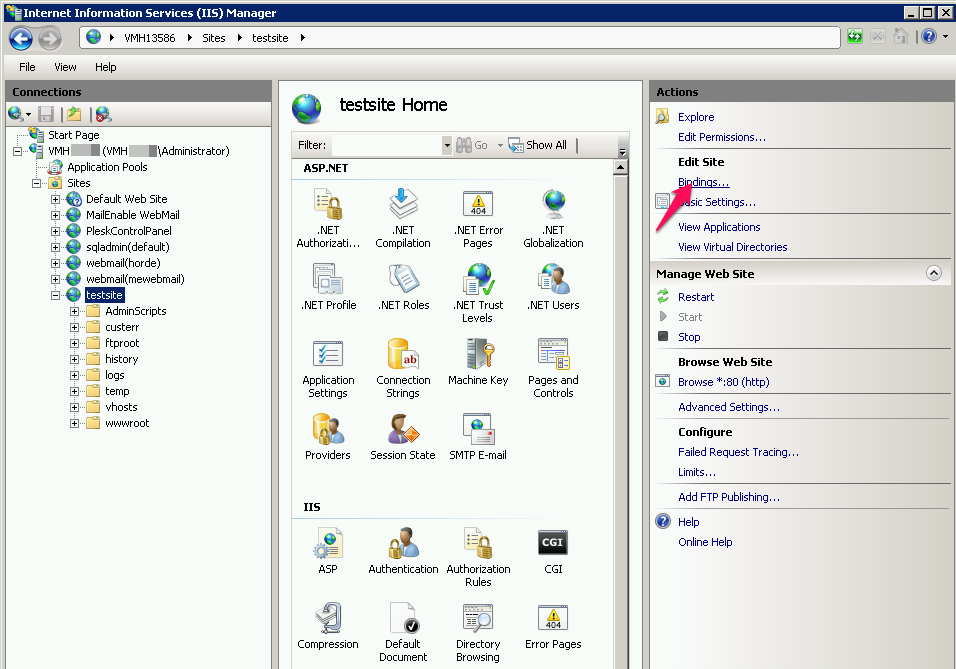
- On the right-hand side, click the Bindings link.
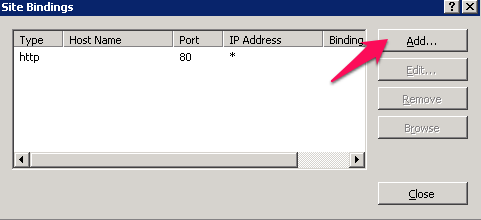
- Click the Add button.
- Select https from the Type drop-down box.
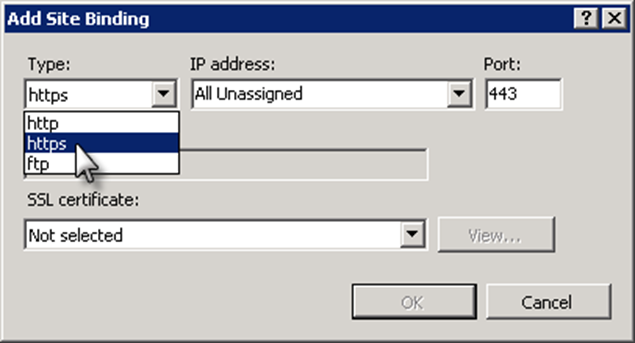
- From the SSL certificate drop-down box, select the certificate you just added.
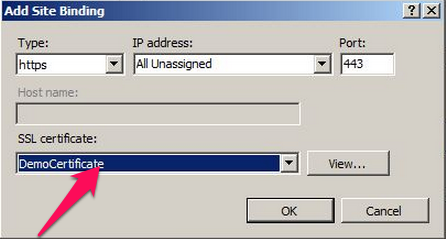
- Click the OK button when you are finished.

