Setting up a POP email account in Windows Live Mail
This tutorial will show you the steps for setting up a POP email account in Windows Live Mail
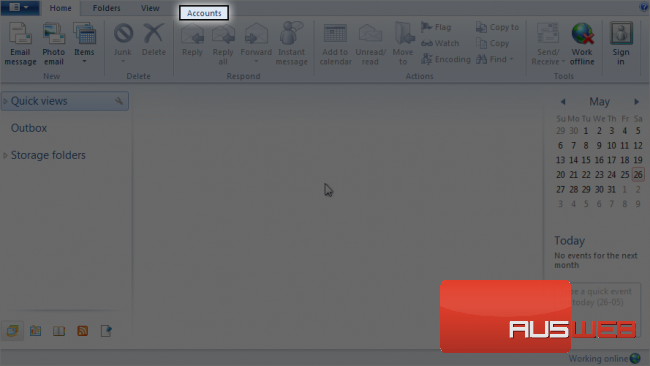
1) To configure a POP email account, first click the “Accounts” tab.
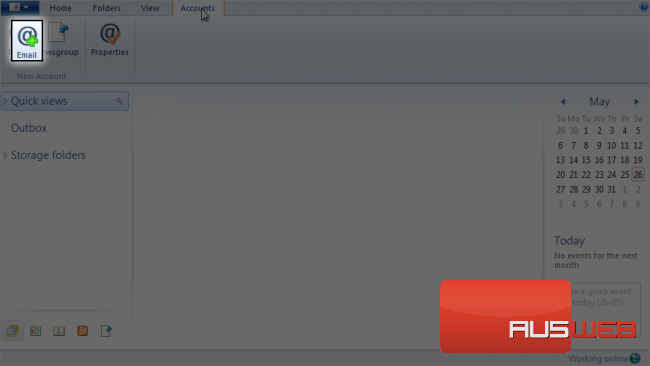
2) Then click The “Email” icon.
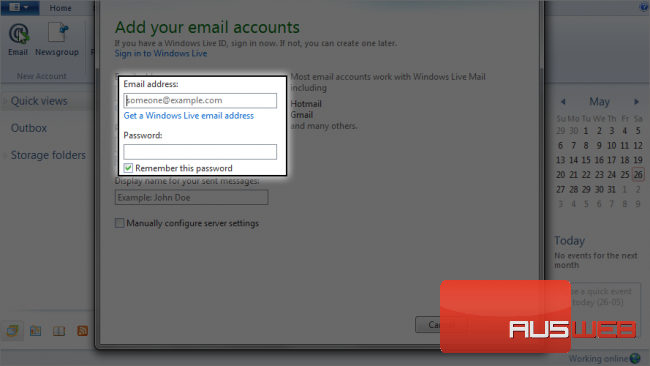
3) Enter the email address you want to configure, and its password.
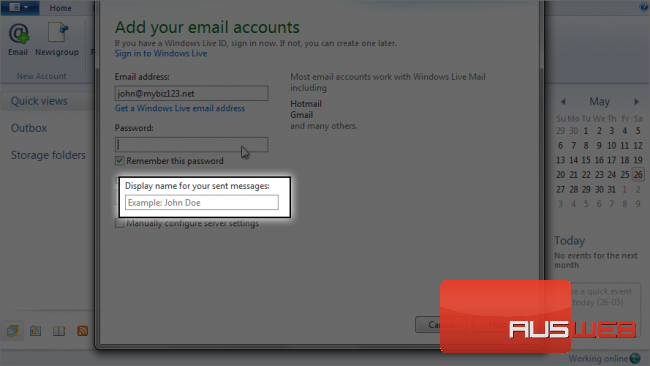
4) Enter a display name for your sent messages.
5) Then click here to manually configure your server settings.
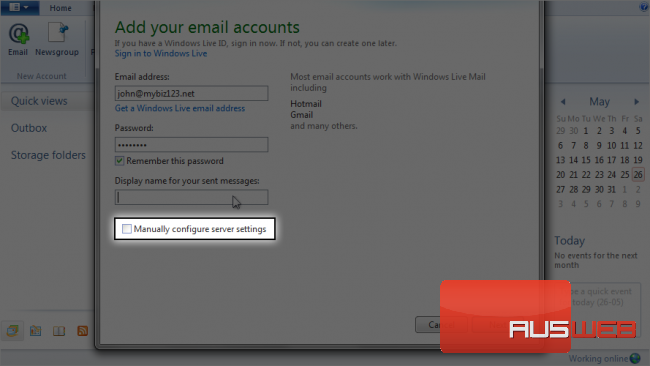
6) Click “Next”.
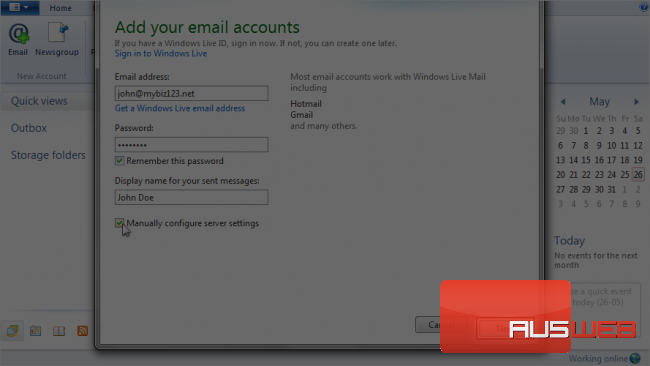
Next we have to configure our server settings.
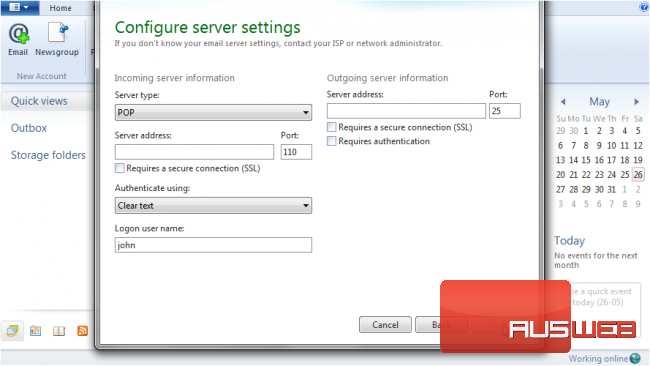
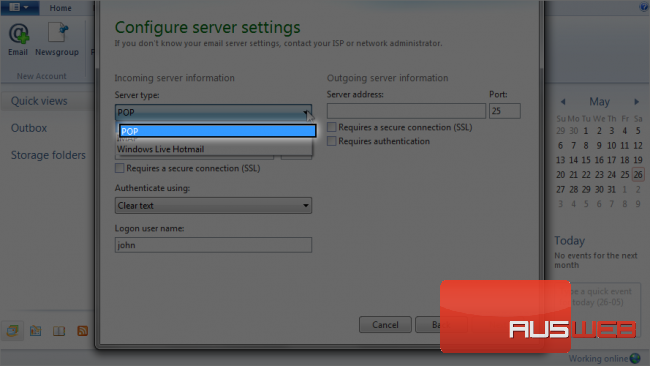
7) Ensure “POP” is selected as the server type.
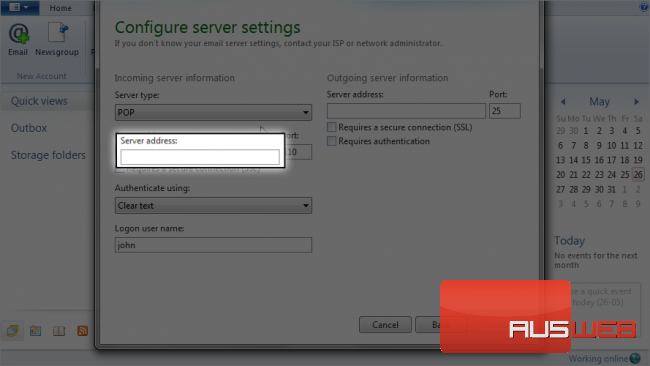
8) Then enter the incoming server address here.
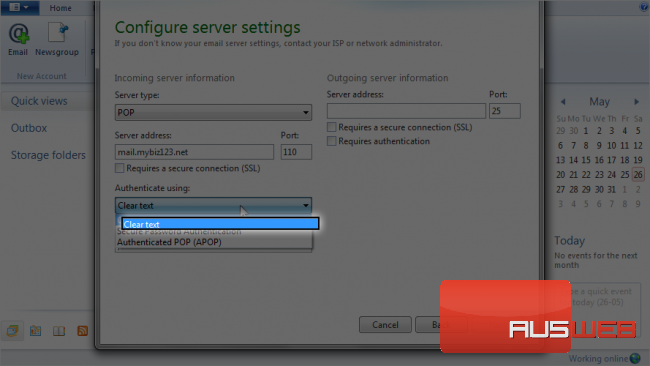
9) Leave “Clear Text” selected as the authentication type.
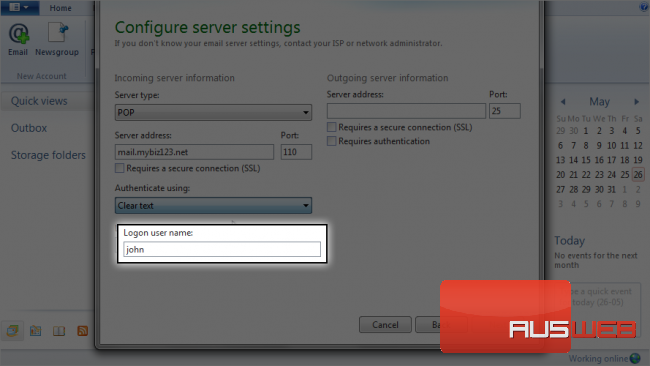
10) Then enter the full email address as your user name here.
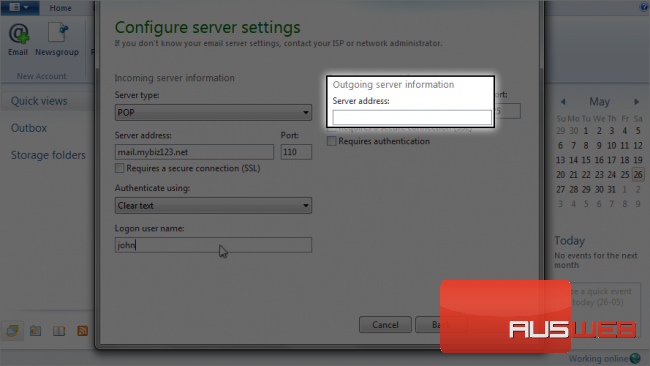
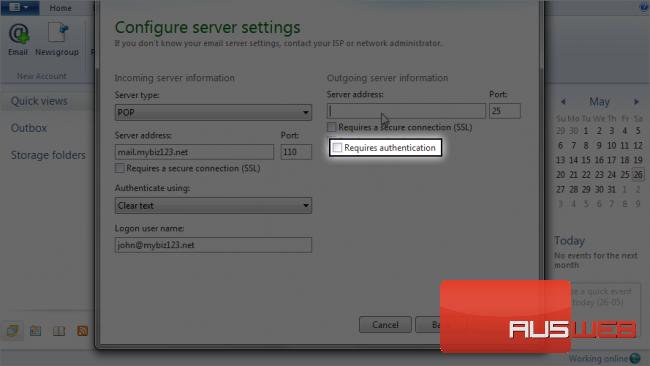
11) Next, enter the outgoing server address here.
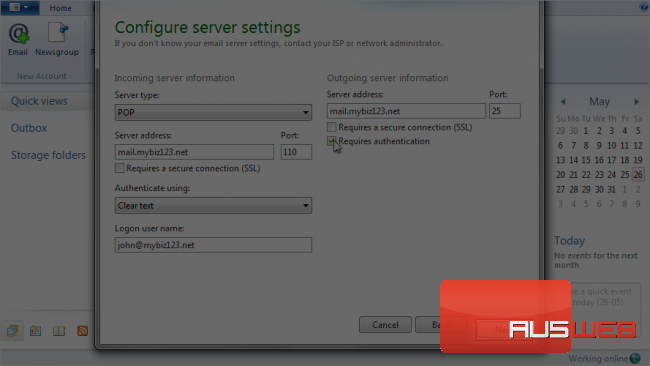
12) Check here to require authentication.
13) Then click “Next”.
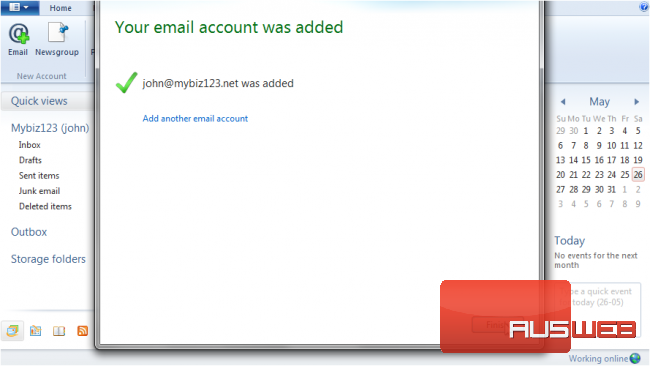
That’s it! The email account has been added.
This is the end of the tutorial. You now know how to configure a POP email account in Windows Live Mail.

